Performing Clinical Review in Patient Centre
Once you have completed Technical Validation for a prescription, an authorized pharmacist can proceed to performing the clinical check and sign off for the prescription in the Clinical Review tab. To see how you can open a prescription ready for Clinical Review, see Opening Clinical Review.
Select the applicable tab to learn how to perform Clinical Review in your province.
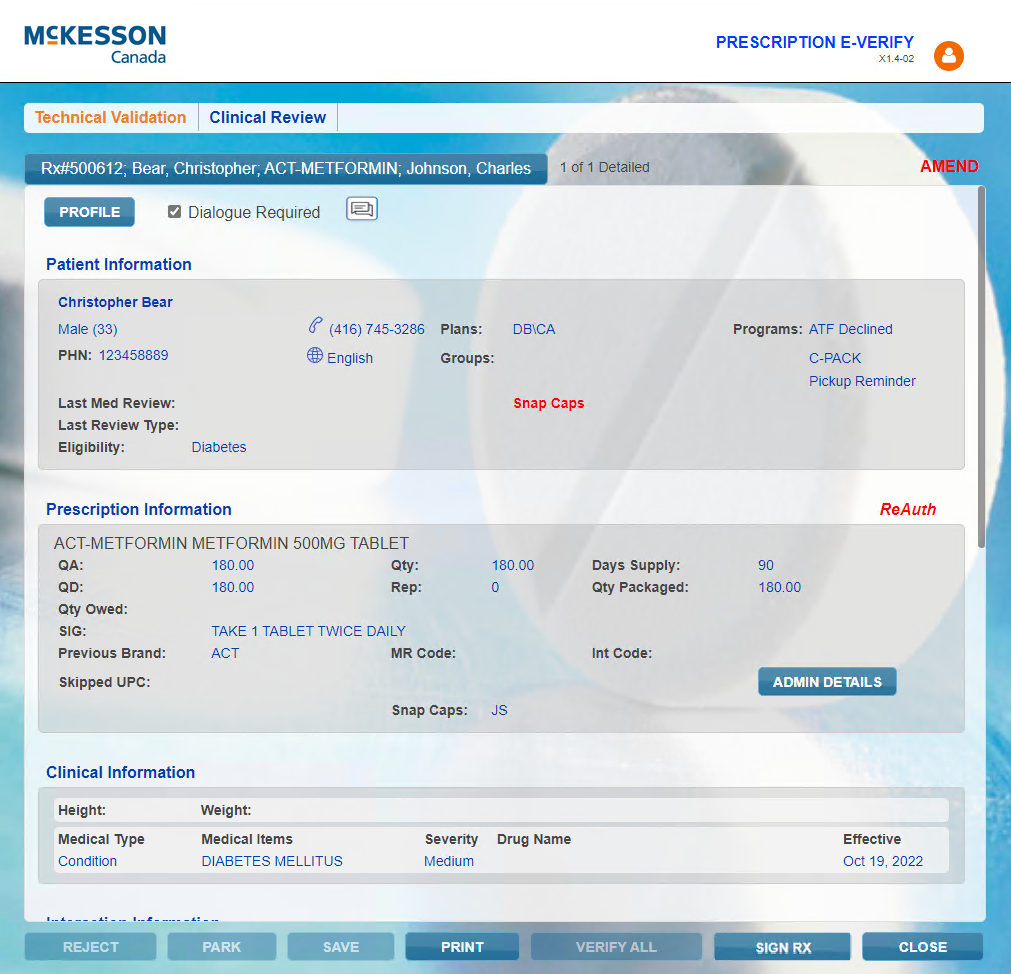
To perform Clinical Review:
-
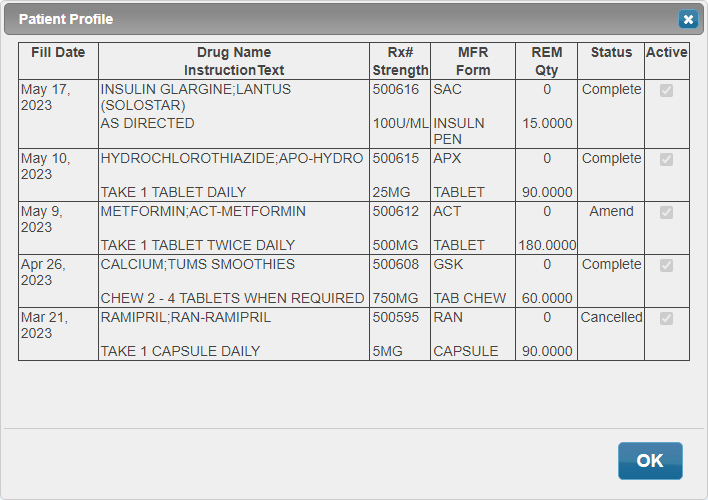
Select the Profile button to review the Patient Profile. The Patient Profile window opens.
-
Optional: If dialogue with the patient is required, ensure the Dialogue Required checkbox is selected.
When this option is selected, the prescription appears in the Pick Up/Delivery/Dialogue module within Patient Centre. If Dialogue has already been completed in previous Workflow steps, a Completed indicator appears beside the checkbox in brackets.
-
Review the following information:
-
Patient
-
Prescription
-
Clinical
-
Interaction - highlight the interaction if applicable and select the magnifying glass
 to view more information.
 -
Notes - displays notes marked as Print in the prescription, Prescriber, Drug, and Patient Notes tabs.
-
Audit History - displays the history of the prescription, such as previous fills and authorizations from the past year.
-
-
Once you have reviewed all appropriate sections, select Sign Rx. The Pharmacist Signature window opens.
-
Sign with your signature.
To perform Clinical Review:
-
Select the Profile button to review the Patient Profile. The Patient Profile window opens.
-
Review the following information:
-
Patient
-
Prescription
-
Clinical
-
Interaction - highlight the interaction if applicable and select the magnifying glass
to view more information. -
Notes - displays notes marked as Print in the prescription, Prescriber, Drug, and Patient Notes tabs.
-
Audit History - displays the history of the prescription, such as previous fills and authorizations from the past year.
-
-
Select the Allergy Check, Pharmanet Check, and/or D.T Issues checkboxes if the checks have not already been performed in Technical Validation.
-
Once you have reviewed all appropriate sections, select Sign Rx. The Pharmacist Signature window opens.
-
Sign with your signature.